Introduction:
Do you regularly find yourself disappointed by stubborn marks and stains on your walls that essentially will not go away? Well, fuss no more! Nowadays, we are attending to let you in on a small mystery weapon that can make those unattractive flaws vanish.
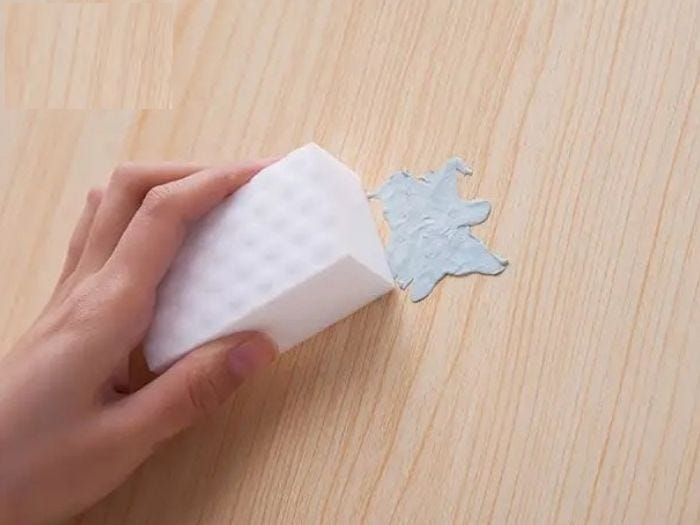
Yes, we are talking about the enchantment of the Magic eraser! This convenient cleaning instrument has picked up very notoriety for its capacity to overcome indeed the toughest stains.
In this article, we will direct you through the method of employing a Magic eraser on your Walls, so you will be able to say goodbye to those adamant marks once and for all!
Why Choose a Magic Eraser?
Before we jump into the nitty-gritty, let us take a minute to investigate why Using a Magic Eraser on Walls. Not at all like conventional cleaning strategies, the Magic eraser does not require the utilization of cruel chemicals or over-the-top scouring.
Its one-of-a-kind melamine froth fabric acts as a delicate grating, lifting stains and grime without harming the paint or surface underneath. It is like having an enchantment wand that wipes absent marks with ease!
Step-by-Step Direct:
1. Assemble Your Supplies:
To induce begin, you will require many essential supplies. Firstly, get a Magic eraser (accessible at most general stores and equipment stores). If you are managing with an especially persistent recolour, consider going for the extra-strength adaptation. Moreover, having a bucket of clean water and a delicate cloth or wipe is helpful.
2. Test the Surface:
As with any unused cleaning item, it is basic to test it out on a little, unnoticeable region of your divider to begin with. This guarantees that the Magic eraser will not cause any harm or discoloration. Once you have got affirmation that all is well, it is time to move on to the most important occasion!
3. Hose the Magic eraser:
Before jumping in, hose the Magic eraser with water to actuate its cleaning control. Be that as it may, make beyond any doubt not to damp it unreasonably, as this may cause trickling that may harm your Walls.
4. Gently Scrub the Stains:
Utilizing light to direct weight, begin scouring the stains on your Walls with the moist Magic eraser. Work in circular movements, cantering on one little region at a time.
For bigger or harder stains, you ought to apply a bit more weight but continuously be cautious not to rub as well.
5. Wash and Rehash:
Once you have handled a segment, wash the Magic eraser, and press out any overabundance of water. At that point, move on to the following range.
Keep in mind, that persistence is key! Deep-seated stains may require numerous passes to disappear. Take breaks if required, and make beyond any doubt re-dampen the eraser as fundamental.
6. Clean-Up and Assess:
After you have secured all the recoloured regions, it is time to do a small clean-up. Take a clean cloth or wipe and wipe absent any residue cleared out behind by the Magic eraser. At long last, step back and respect your workmanship!
Conclusion:
Employing a Magic eraser on your Walls can be a game-changer when it comes to handling tough stains. With its delicate however successful cleaning power, this little apparatus can work ponders on an assortment of surfaces without causing harm.